
Grout Styles

In the world of masonry, there are many variables that can affect the overall look of a project. One of these variables is the grout style in which the stone is laid. What this means is the way that the mortar is filling the crevices between the stones. This grout styling can include not only the width of the joint but how much mortar you choose to keep within the joint and even the color of the mortar used. I will be laying out the various styles that I have come across in these last 10 years in the stone business.
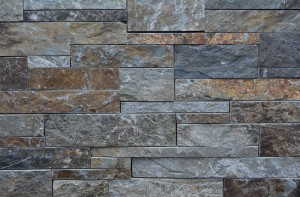
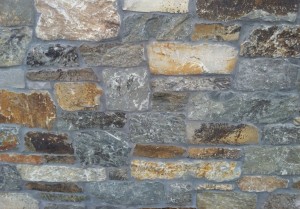
Moose Mountain Ashlar – Cut Ends – 2″, 4″, 6″ Heights – Drystack
One of the most popular stone installations is the DRYSTACK application. In this application the stone is laid very tight and the mortar is raked out of the joints giving the appearance that there is no mortar in the wall. Hence the name “dry”stack. This technique caters to many design styles and works great for those looking for a very clean and refined look.
Chief Cliff Blend Ledge Thin Veneer – 1/4″ Joint
The next one I will talk about is a NARROW JOINT style. This is typically laid with a 1/4″ wide joint. This can be finished with a deep or shallow raking. I will be explaining the difference between the deep and shallow rake style below.
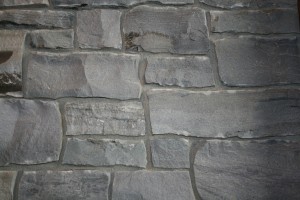
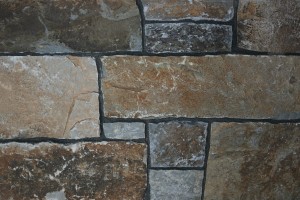
Autumn Gold Ledge Thin Veneer – 1/2″ Joint, Deep Rake
Next is a WIDE JOINT style. Typically this is laid with a 1/2″ joint or wider. This style is very versatile in how you can finish the joints (i.e. deep rake, shallow rake, overgrout and Alamo joint – all will be discussed below). This joint style is also good if the stone chosen lends itself better with a wide joint, such as a random or mosaic stone that is difficult to lay very tightly due to its shape.
When installing stone with a wider joint you have a couple choices for finishing these joints. One option is to rake the joints out, revealing more of the edges of the stone. This is referred to as a DEEP RAKE JOINT and will create more definition to the stone and refine the edges.
The photo to the left shows a wide 1/2″ joint with a deep rake finish.
Cobalt Creek Ledge Thin Veneer – 1/4″ joint, Shallow Rake
Another option when installing stone with wider joints is to leave some mortar between the stones. This style is referred to as a SHALLOW RAKE joint. This will create a more flush appearance to the stone.
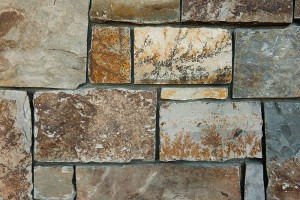
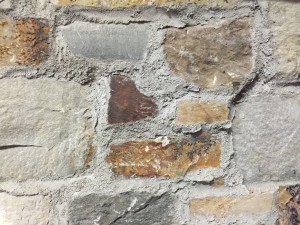
McGregor Lake Ledge Thin Veneer – Overgrout Joint
The next option is an OVERGROUT JOINT. This style is where the mortar overfills the joints and covers the edges of the stone. This style is very popular for those wanting to obtain an Old world look on the project.
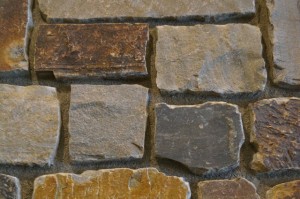
McGregor Lake Ledge with Alamo Joint
If you are looking to achieve an extreme overgrout appearance, then the ALAMO JOINT may be just what you need. This style is very rustic and even at times can appear to be thrown together. In all honesty, this is one of the hardest styles to do in order for it to look good, you need to know how to work with the mortar.
Moose Mountain Ledge Thin Veneer – Dark mortar
Next I want to talk about mortar colors. Standard mortar is a grey tone and the most commonly used nationwide. However, if you want to add something unique to your project you can add a dye powder to your mortar and really change the entire look of the stone. These dyes can range from a light sand tone, to brown, to dark grey, to black and anything in between. These dyes can be purchased from your closest masonry supply store.
So there you have it! I hope this post helps in both understanding the different grouting styles and techniques but in choosing how you want the stone installed on your next project! Check back soon for more informational blogs!